Volume Rendering
Guide to using volume rendering for medical image visualization.
Select Volume Rendering
- Click on Volume Rendering Button from sidebar

Select a Volume
- Use the dropdown menu labeled
Select a Volumeto choose the volumetric dataset you wish to visualize.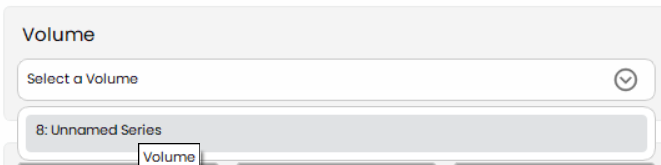
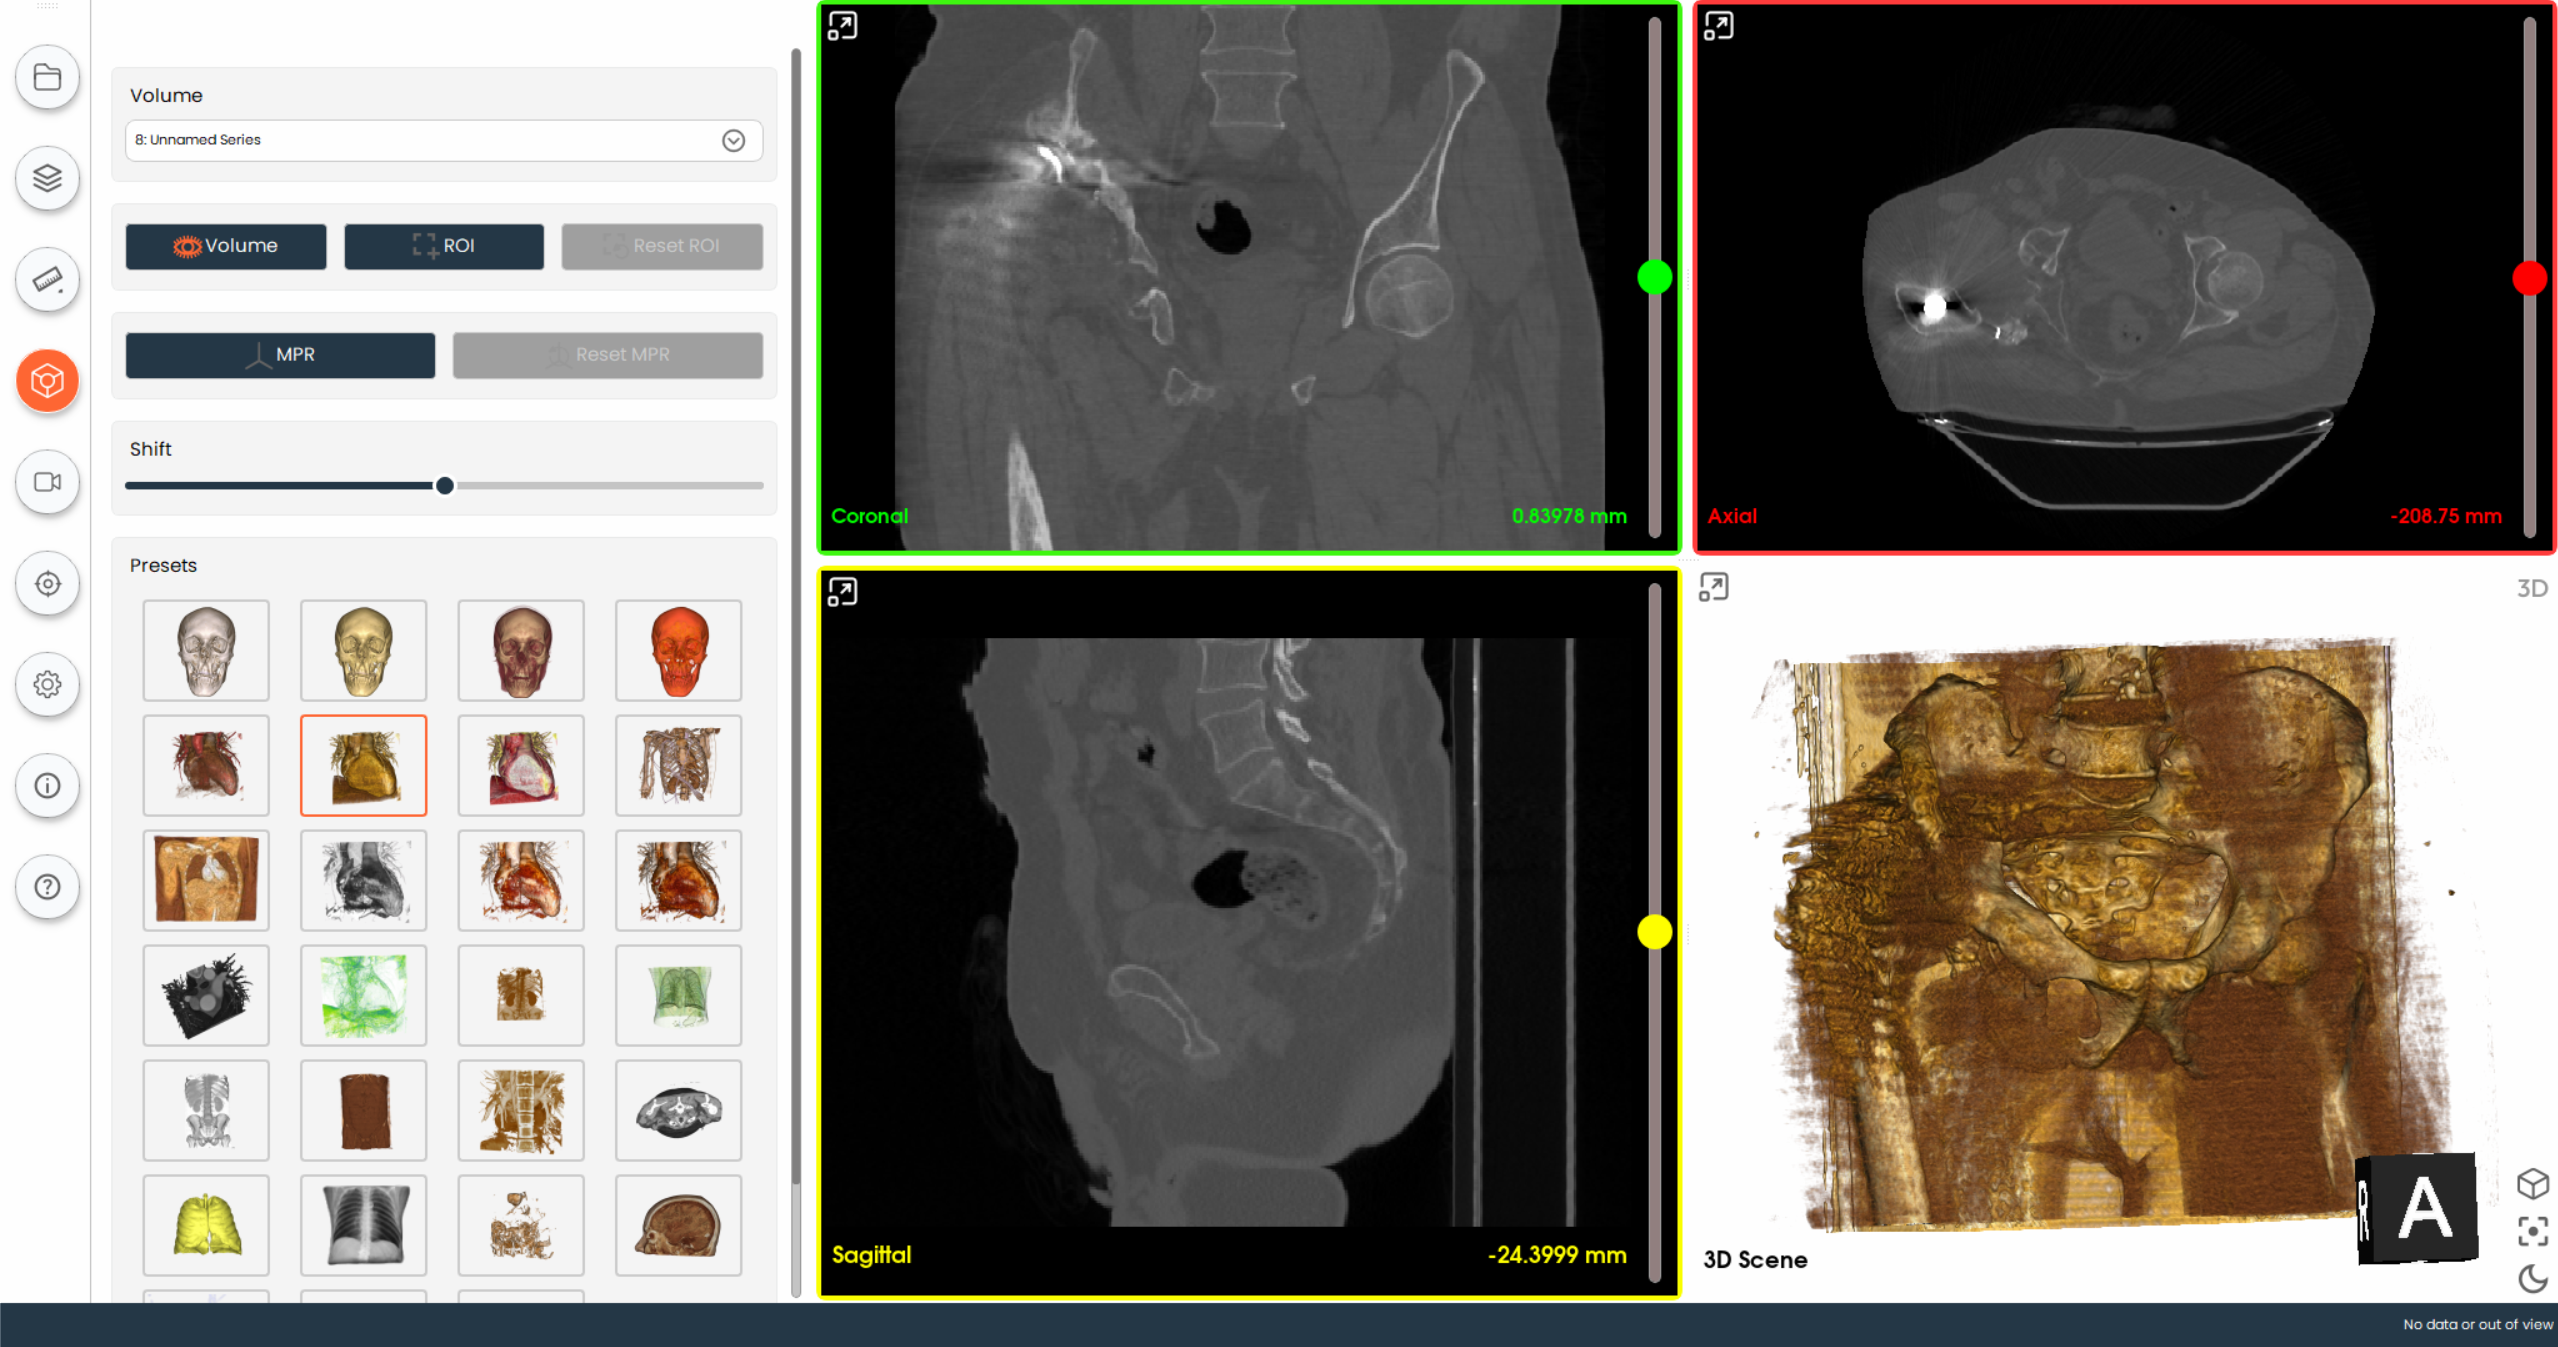
View Volume
- Click on the
Volumebutton to view the entire volume rendering in the 3D scene.
Define and Reset ROI
- Define ROI:
- Click on the
ROIbutton to define a Region of Interest within the volume. - Adjust the ROI box by dragging the handles to cover the area you are interested in.
- Click on the
- Use the sliders to fine-tune the ROI dimensions.

- Reset ROI:
- Once the ROI is defined, click on the
Reset ROIbutton to reset the ROI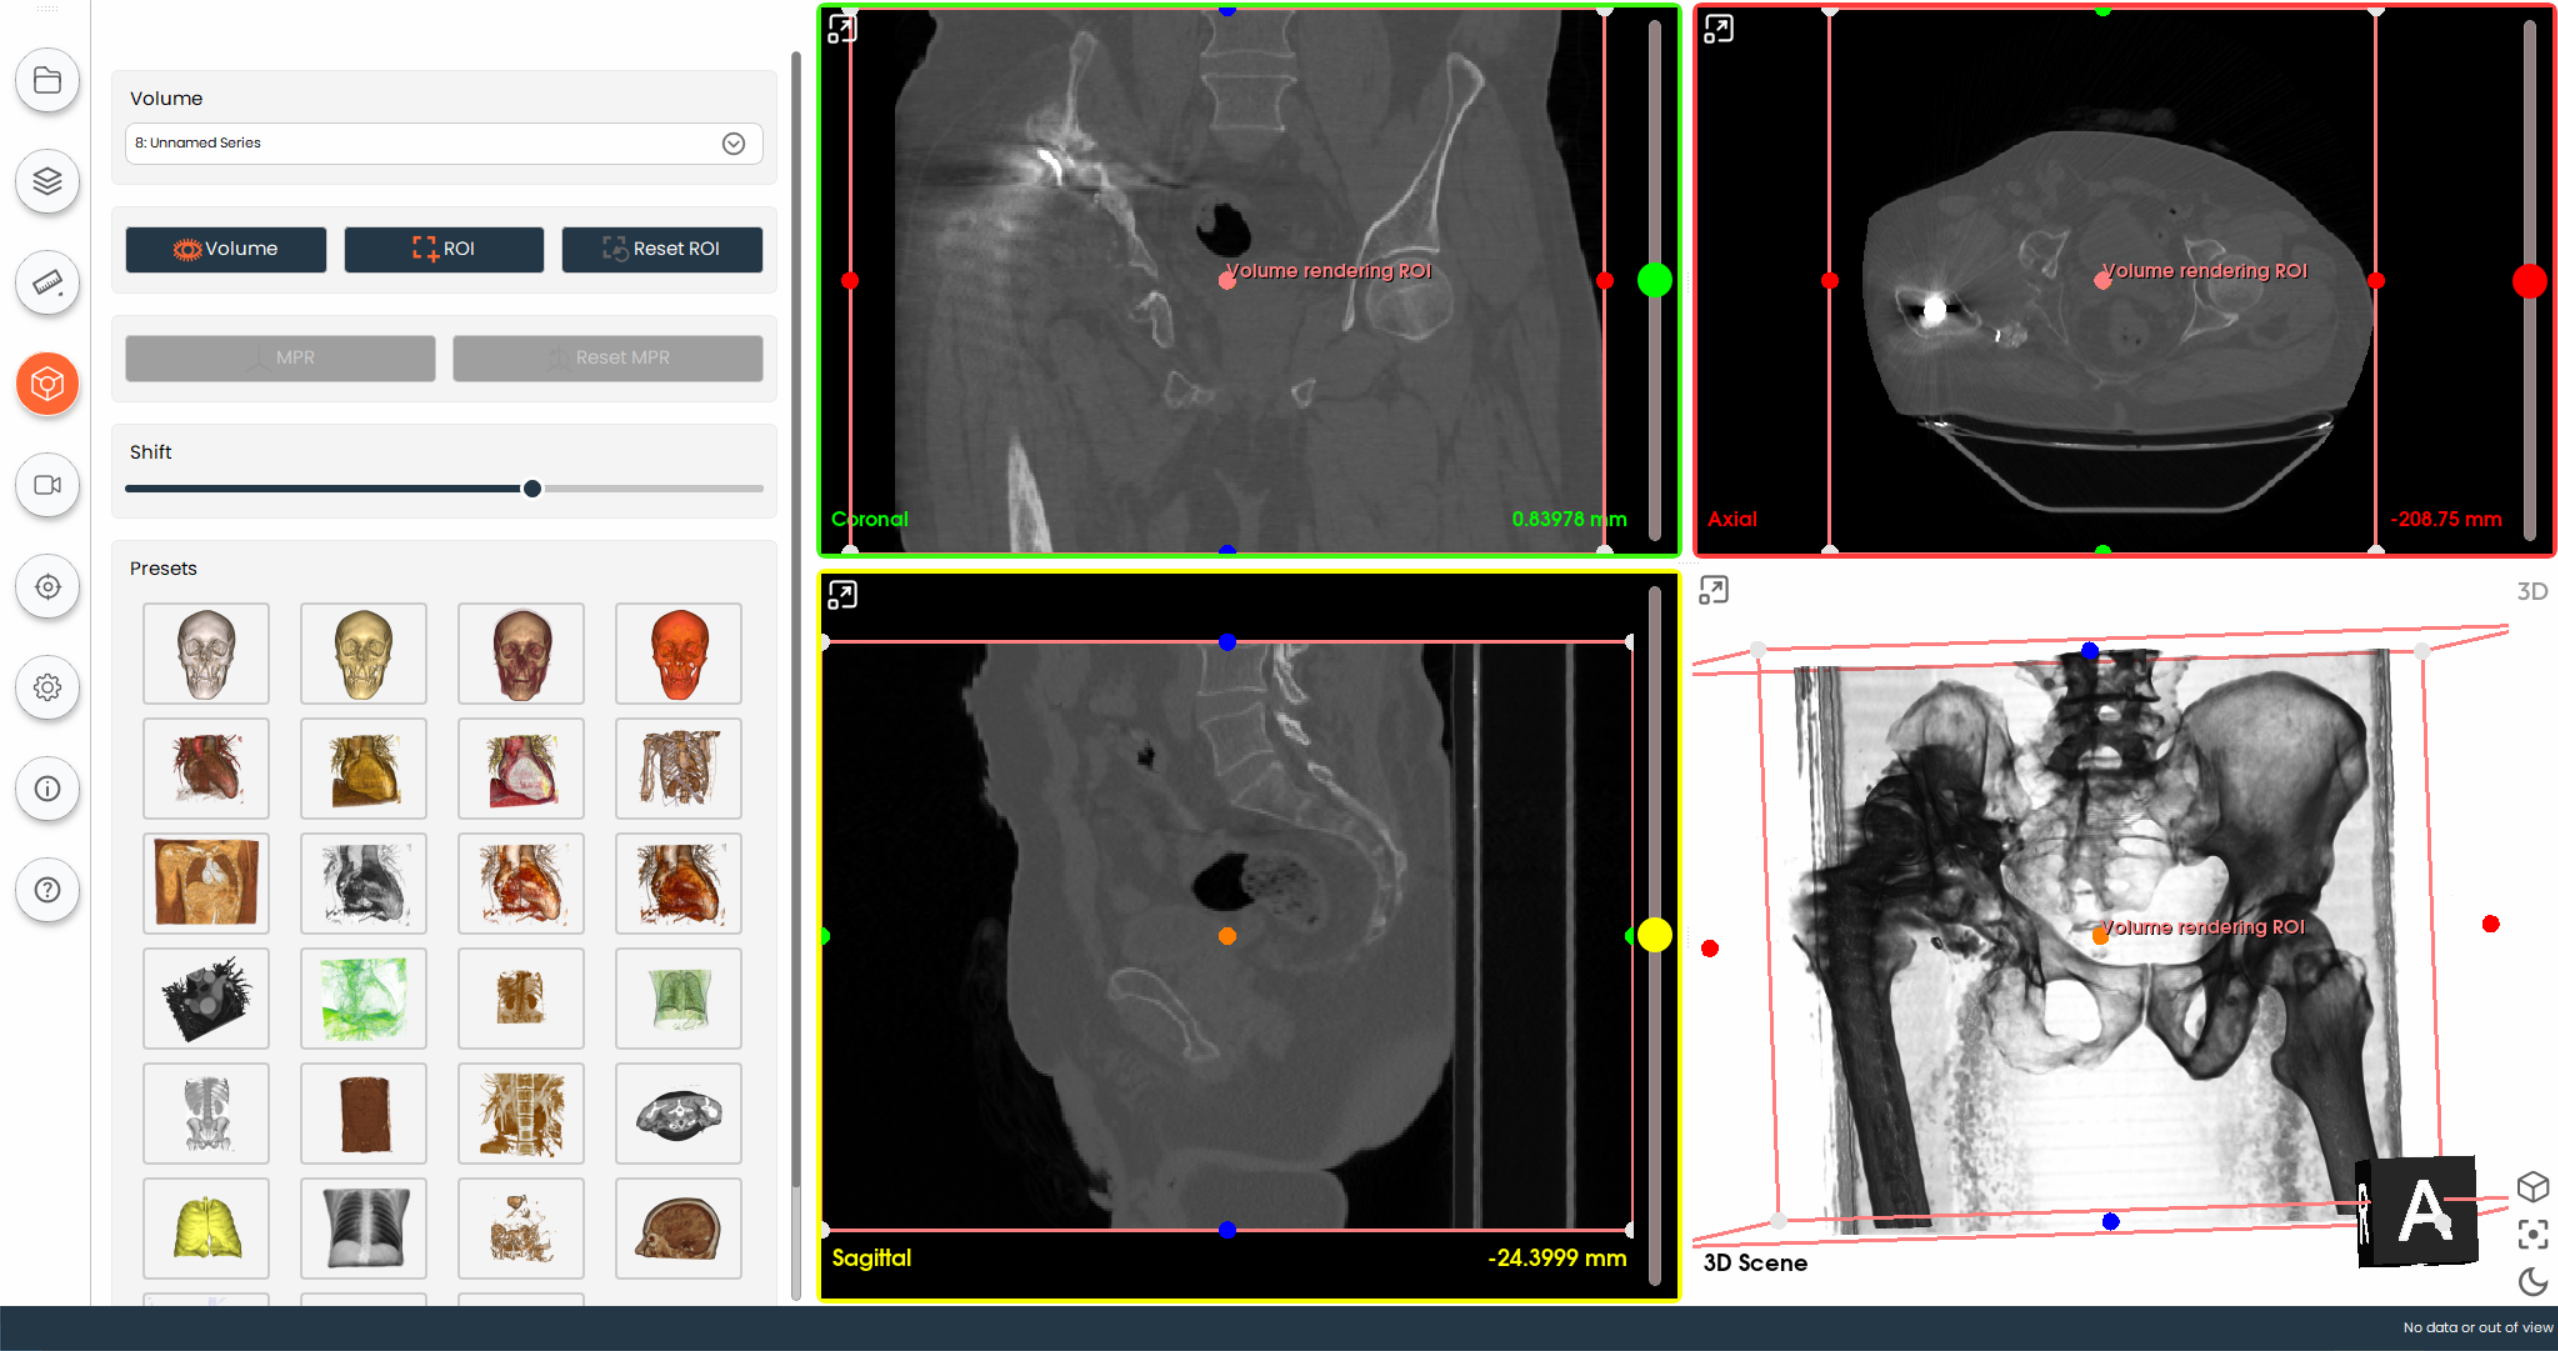
- Once the ROI is defined, click on the
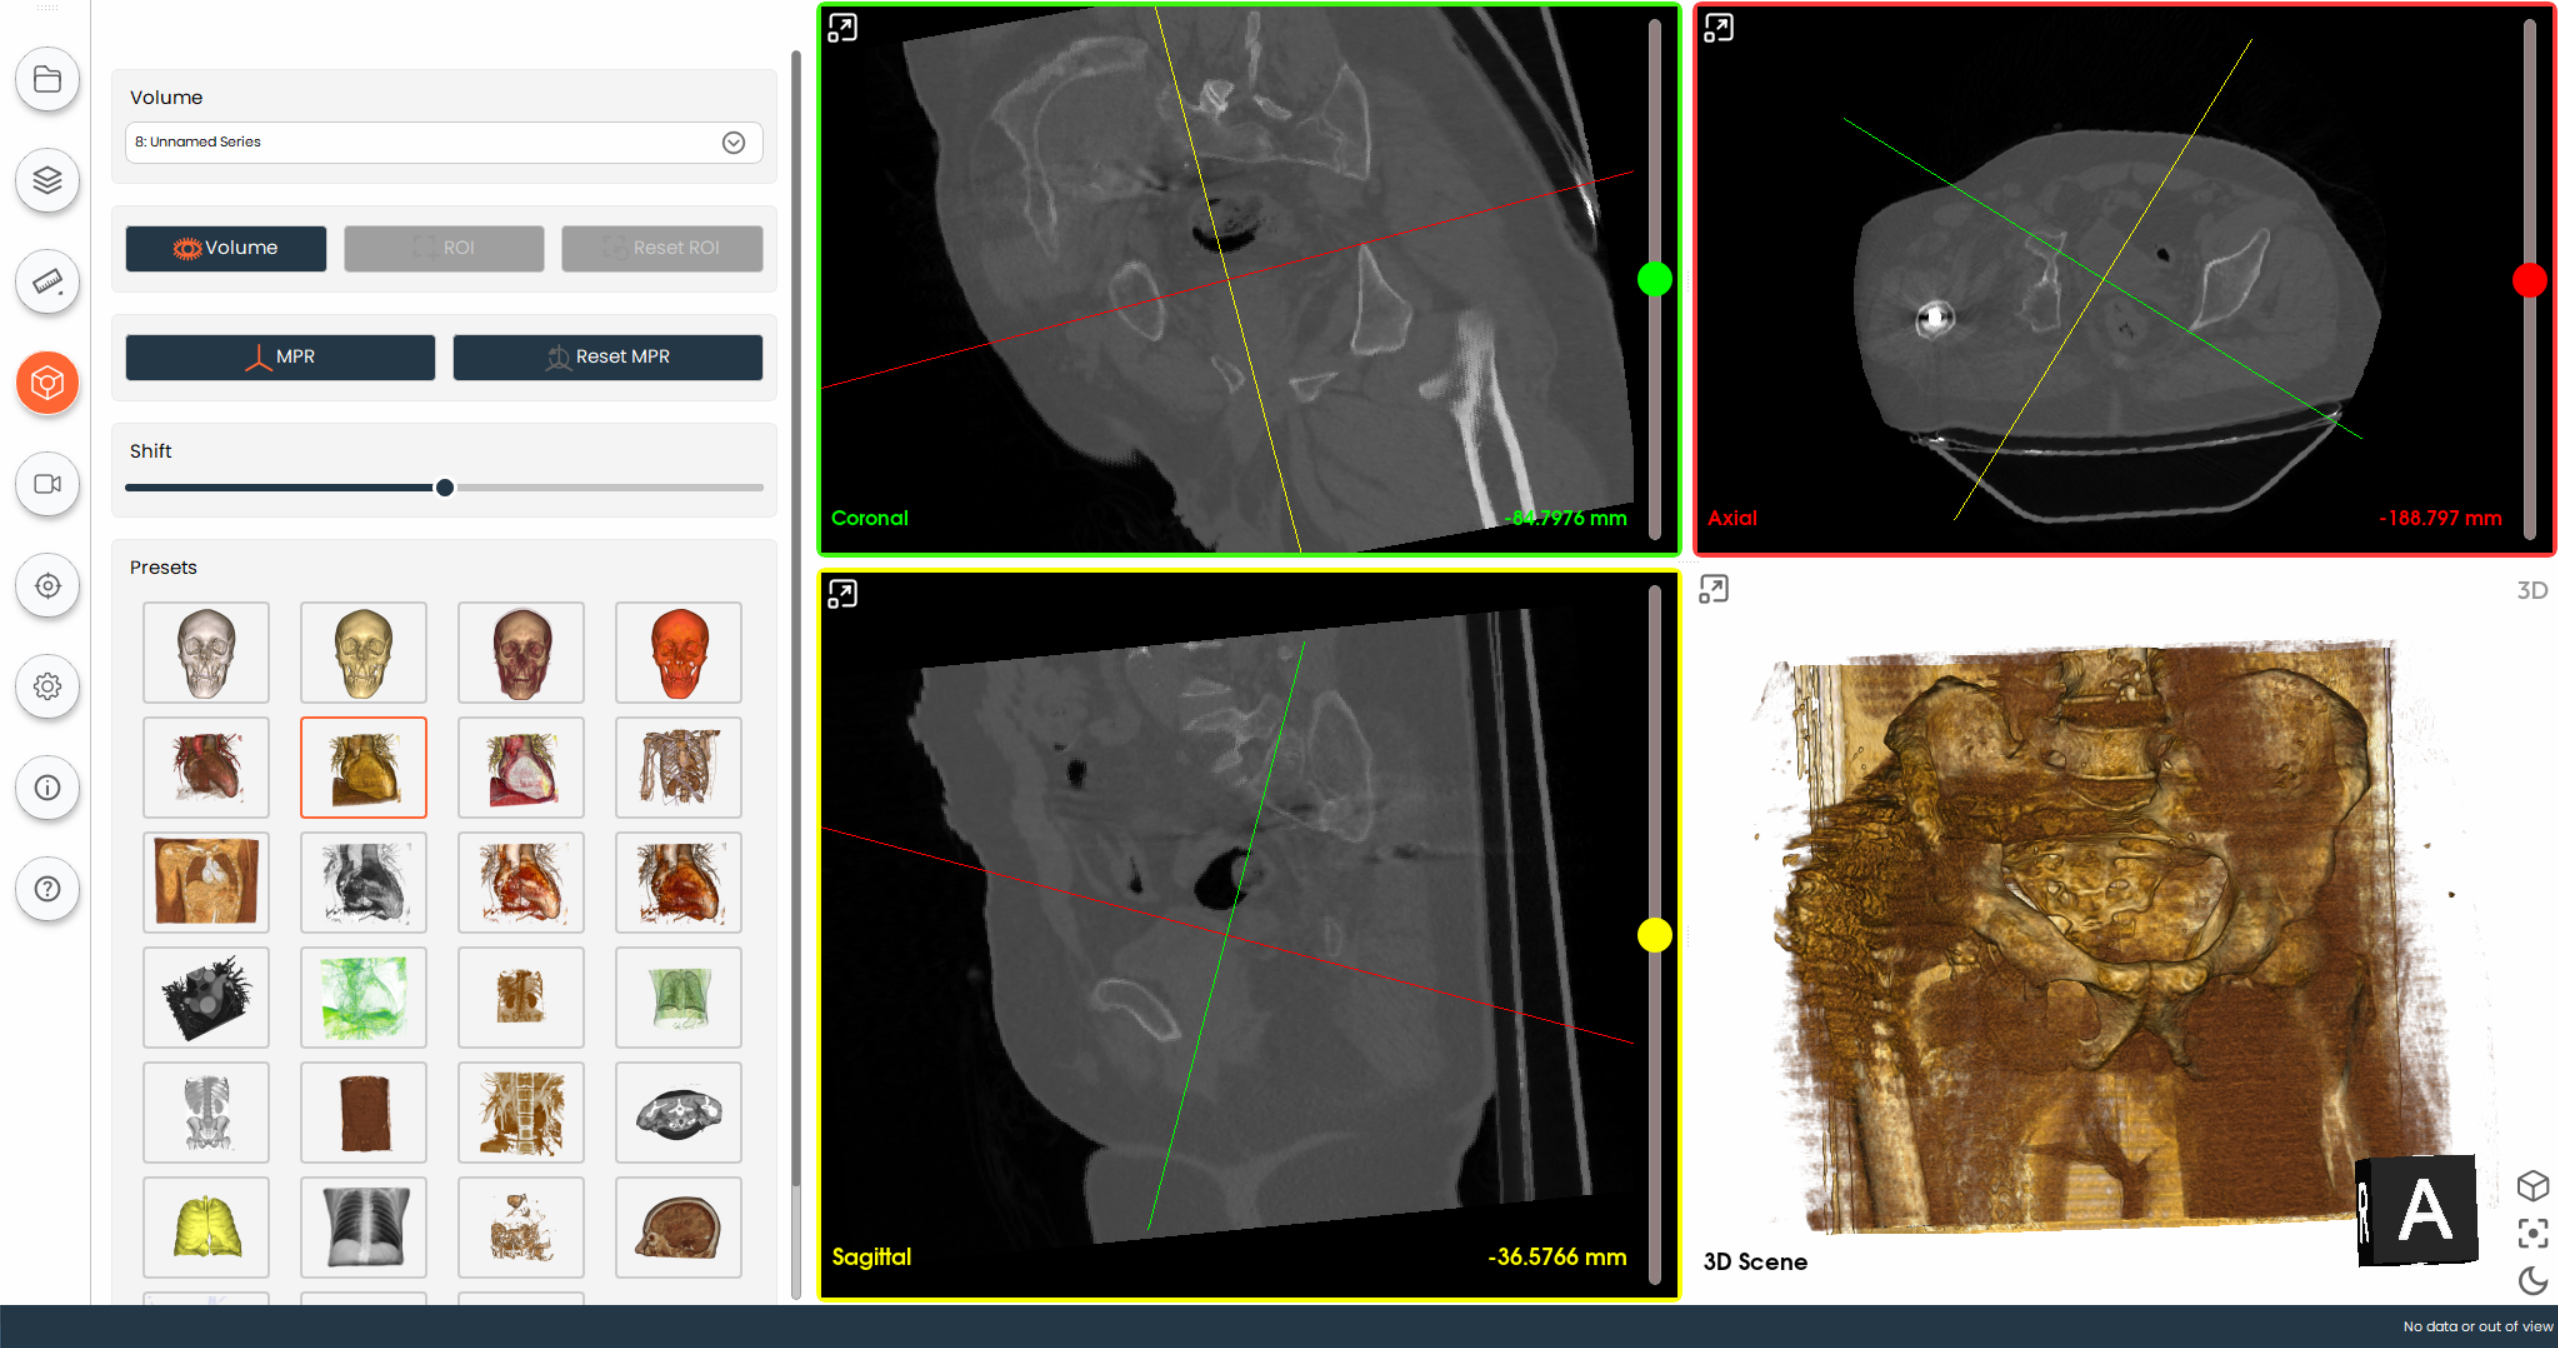
Navigate Multiplanar Reconstruction (MPR) Views
- Adjust the planes by dragging the colored lines within each view to get a better perspective of the regions of interest.
Adjust Volume Rendering
- Use the slider under the
Shiftlabel to adjust the intensity threshold of the volume rendering. This helps in highlighting specific structures within the volume.

Apply Presets
- Click on one of the preset thumbnails to quickly apply predefined rendering settings. These presets are tailored for different anatomical regions and imaging needs (e.g., head, chest, abdomen).