GPU Configuration
Properly configuring your GPU can significantly improve MySegmenter's performance, especially when processing large datasets. The steps below apply to NVIDIA, AMD, and Intel graphics cards.
General Steps to Set Up the GPU
-
Open the Graphics Card Control Panel
Go to the Start menu and search for your graphics card's control panel. -
NVIDIA: Search for "NVIDIA Control Panel."
-
AMD: Search for "AMD Radeon Settings" or "Catalyst Control Center."
-
Intel: Search for "Intel Graphics Control Panel."
-
Select the Preferred GPU
In the control panel, locate the option that lets you assign a preferred GPU for specific applications.
Select the dedicated high-performance GPU (NVIDIA or AMD) as the preferred processor for MySegmenter
- Apply the Settings
Click Apply to save the changes.
This ensures that MySegmenter will use the specified GPU for better performance.
- Launch MySegmenter
After saving the GPU settings, launch MySegmenter. The application will now use the selected GPU for all processing tasks.
Example: Configuring NVIDIA GPU for MySegmenter
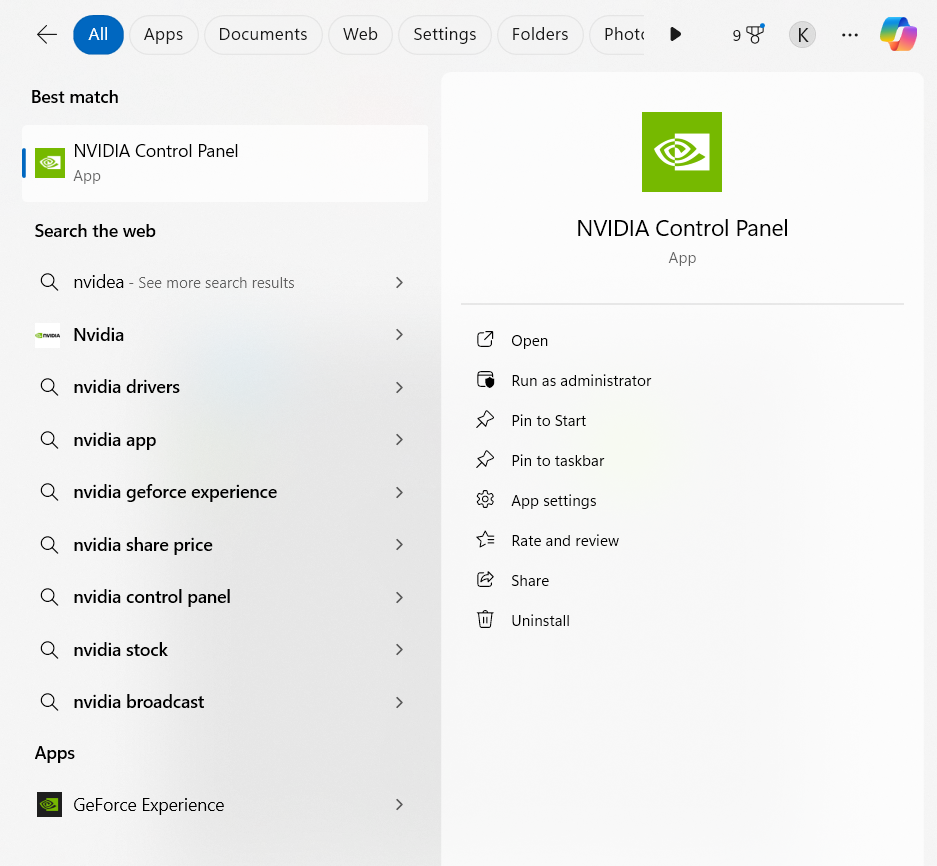
- Open NVIDIA Control Panel
Press the Windows key and type "NVIDIA Control Panel."
Click on the NVIDIA Control Panel app from the search results
-
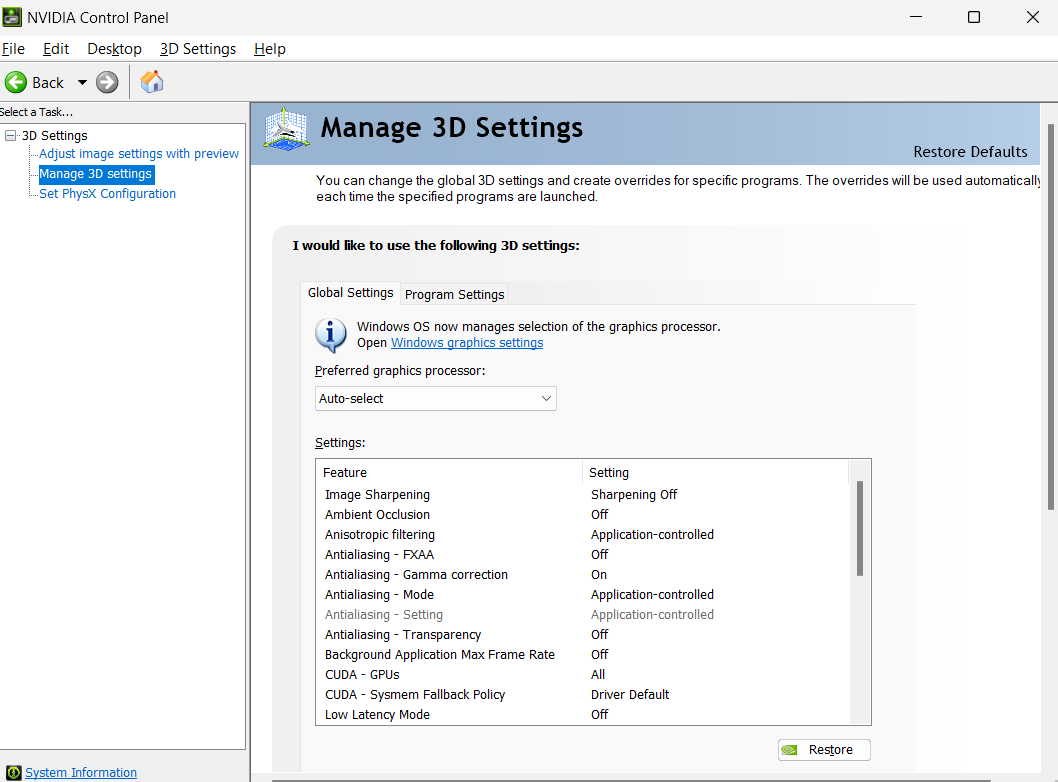
Access Manage 3D Settings
In the NVIDIA Control Panel, on the left sidebar, click on "Manage 3D Settings" under the 3D Settings section.
-
Select the Preferred Graphics Processor
Under the "Global Settings" tab, find the "Preferred graphics processor" dropdown.
Select "High-performance NVIDIA processor" from the dropdown options.
-
Apply the Settings
Once you've made the necessary changes, click on the "Apply" button at the bottom right to save the settings.
Summary
Following these steps ensures MySegmenter uses your dedicated GPU for all operations. The NVIDIA walkthrough above serves as a detailed reference; the process is similar for AMD and Intel cards. Proper GPU configuration is especially beneficial when working with large DICOM datasets or complex segmentation workflows.